Wacko Front
Date 8/20/2007
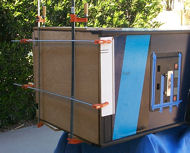
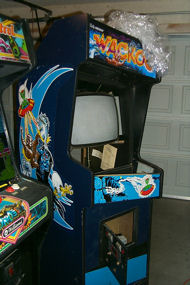 As you can see from this picture, the art work is pretty decent. As you can see from this picture, the art work is pretty decent.
The control panel has already been removed in this picture.
|
Bottom of Cabinet
Date 8/20/2007
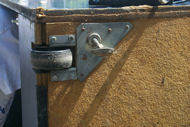 The bottom was made from 3/4" Partical board. The bottom was made from 3/4" Partical board.
If you look closely, you can see how bent the Leg Levelers are. Normally they should be straight, and not bent at a 45 degree angle!
|
Cutting out the Bottom
Date 8/20/2007
 With my Brother's help, we cut out the bottom of the cabinet. With my Brother's help, we cut out the bottom of the cabinet.
First we started by drilling a hole in the bottom and then used a Skill Saw to cut the bottom out chunk by chunk.
|
The Sponge!
Date 8/20/2007
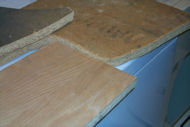 Here you can see how much the wood has swollen. Here you can see how much the wood has swollen.
Both pieces of wood are supposed to be 3/4" thick. The Particle board is now about 1/4" thicker.
|
Gluing in the New Bottom
Date 8/20/2007
 I hate particle board, so the bottom was replaced by high quality plywood (Oak if I remember correctly). It's not original, but it will last a lot longer. This is one area where I opted for an "Upgrade" over going 100% original. I hate particle board, so the bottom was replaced by high quality plywood (Oak if I remember correctly). It's not original, but it will last a lot longer. This is one area where I opted for an "Upgrade" over going 100% original. We also had to modify the cabinet slightly to make it easier to put the new bottom in. The original cabinet had a 1/4" dado cut along the the bottom. Since the cabinet is already assembled, this makes it very hard to insert the new bottom without breaking the cabinet further. We opted to convert the dado cuts into rabbit cuts. It's not as strong as the original, but for home use and the fact that we will be stappling in brace blocks later, it will do just fine.
|
Inside Bottom Looks nice now!
Date 8/20/2007
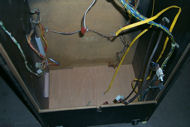 Looks brand new ! Well, ok, that's because it is :-) I'll put up a picture of the original inside later once the re-assembly process has begun. Looks brand new ! Well, ok, that's because it is :-) I'll put up a picture of the original inside later once the re-assembly process has begun.
|
Coin door needs work
Date 8/20/2007
 The coin door had a lot of rust on it. The coin door had a lot of rust on it.
I removed everything and sent it off to the powder coaters. I'm still working on the coin door, and will post a picture as soon as it's complete.
|
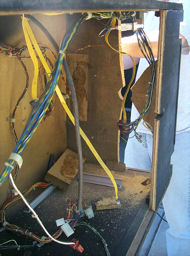
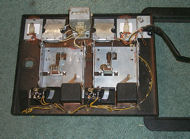
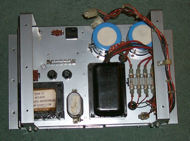
Power Supply has seen better days
Date 8/20/2007
 Ok, technically, this isn't the "Power Supply" but rather the Isolation Transformers, fuses, etc... however, it does supply power to things like the coin door lights, etc... Ok, technically, this isn't the "Power Supply" but rather the Isolation Transformers, fuses, etc... however, it does supply power to things like the coin door lights, etc... As you can see, it's pretty rusty. I tore this appart, taking LOTS of pictures as the inside of that thing has wires going everywhere. Without those pictures, the re-assembly would have been a nightmare. Off to the powder coaters it goes....
|
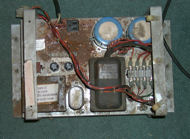
Looks Brand New!
Date 8/20/2007
 Inspired by Brent's Pole Position Restoration (See Image #34) I decided to get all the parts powder coated (chromed). All I can say is WOW. That makes it look great! Inspired by Brent's Pole Position Restoration (See Image #34) I decided to get all the parts powder coated (chromed). All I can say is WOW. That makes it look great! Again, not 100% original, but the powder coating will prevent it from ever rusting again, and it looks fantastic! An upgrade that is well worth it. The original appears to be galvanized sheet metal. The two Isolation transfomers were faded pretty bad, so I taped them up and hit them with a coat of Rustolem Black paint. They look great now. One thing to keep in mind if you decide to do this. The powder coating does NOT conduct electricty. So anywhere that was supposed to conduct will either have to be covered prior to painting or stripped down once the painting is done. There were only a few places that I had to do this with and the dremel made quick work of it.
|