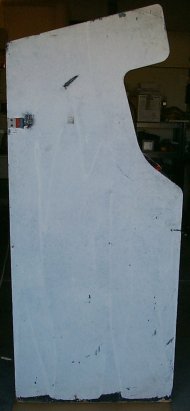
It Looks Ugly, but....
Date 10/28/2004
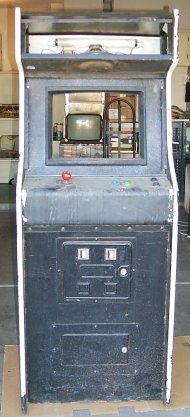 Yes, this cabinet looks ugly, but it's really not that bad. The cabinet is in solid shape with minimal damage at the bottom. Yes, this cabinet looks ugly, but it's really not that bad. The cabinet is in solid shape with minimal damage at the bottom. If you're restoring a game, this is probably the most important aspect of it. If the cabinet is falling apart, it would be easier to just build a new Cab from scratch or find another cabinet. The coin doors are in excellent shape, which is good news! We'll probably want to repaint those.
|
Good News Here
Date 10/28/2004
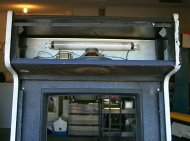 Good news here because the speaker grill is intact and all the original parts are still here. A lot of the times you'll get games where someone has punched in the speaker grill, possibly damaging the Speaker in the process. Good news here because the speaker grill is intact and all the original parts are still here. A lot of the times you'll get games where someone has punched in the speaker grill, possibly damaging the Speaker in the process. Mark Jenison on USENET mentioned that he used a product called Paw Proof as a replacement. I haven't seen the stuff personally, but it seems like it might be a good match.
|
Good/Bad news here
Date 10/28/2004
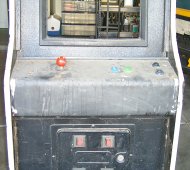 Well, the left Joystick appears to be where the original Robotron Joystick was, however, they drilled a second hole on the right side through the metal plate and put a button in the hole where the second joystick goes. Well, the left Joystick appears to be where the original Robotron Joystick was, however, they drilled a second hole on the right side through the metal plate and put a button in the hole where the second joystick goes. The metal plate was destroyed, but this should be an easy fix. I'm sure I could find someone local to make a new plate as they are not really complex. The purpose of the metal plates to prevent people from destroying the control panel when they are playing it, so it's possible that we don't even need it. It would all depend on how abusive they get with the game. Extra bolts where added as well which will be removed and the holes filled.
|
Original Start Buttons
Date 10/28/2004
 As luck would have it, the original buttons are still here! As luck would have it, the original buttons are still here!
The Blue Translucent buttons. They will need to be cleaned up a lot, but they don't look damaged in any other way, just really dirty.
|
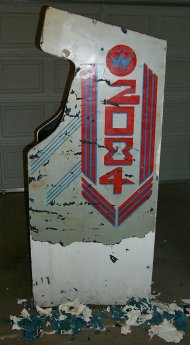
Love the paint job...
Date 10/28/2004
 Lovely paint job, wouldn't you agree? Why would anyone want to change it? Lovely paint job, wouldn't you agree? Why would anyone want to change it? Ok, you can stop laughing now. This is probably the WORST paint job I've seen so far. All of this paint comes off. While Dave and I were stripping the paint off, we discovered a new technique (at least new to us) that works wonders! More on that later.
|
Looks like a Lock was attached here....
Date 10/28/2004
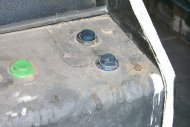
 It looks like they had a lock clasp attached to the game here. It looks like they had a lock clasp attached to the game here.
Probably to keep people out of the back of the game. We'll need to fill in these holes.
|
Right Side
Date 10/28/2004
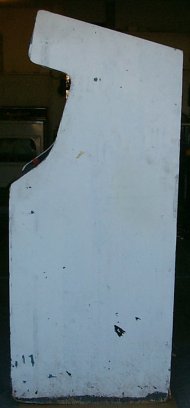 The right side is in similar shape to the left side. The right side is in similar shape to the left side.
Not much to note here.
|
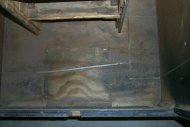
A little beat up
Date 10/28/2004
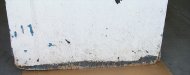 The bottom edge is a bit beat up. The bottom edge is a bit beat up.
Probably going to use a Router to cut a square chunk out then use a strip of wood to replace it. This type of damage is typical with a lot of games. This is generally due to missing Leg Levelers. This game is missing the Leg Levelers.
|
Back Door
Date 10/28/2004
 The back doors are beat up and will be replaced. The back doors are beat up and will be replaced.
Everything else appears to be in good shape.
|
Nice Hack Job
Date 10/28/2004
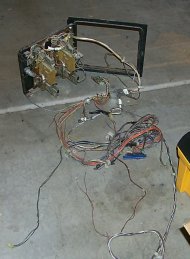
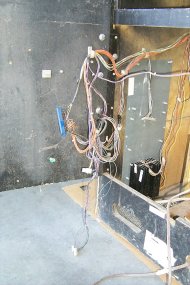 Well, at least they reused as much of the oringal game as possible. Well, at least they reused as much of the oringal game as possible.
Most times, the harness would be a total loss. Here, I think it will be fairly easy to repair the damage. This is really good news since building a Williams Harness from scratch is a pain (I've done it twice so far).
|
Is this a Robtron or a Trash Can?
Date 10/28/2004
 Well, there is a lot of junk in the bottom of this cabinet. Well, there is a lot of junk in the bottom of this cabinet.
This is normal and will get cleaned out.
|
Volume Control
Date 10/28/2004
 Most of the restorations I've worked on, the Volume control is usally missing. Most of the restorations I've worked on, the Volume control is usally missing.
Apparently a lot of JAMMA games had Volume control built on to the PCB or something. Why they didn't just leave them most of the time, is beyond me.
|
Typical Power Cord
Date 10/28/2004
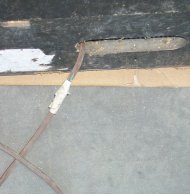 Yep, this one has been "Patched" just like all the rest. Yep, this one has been "Patched" just like all the rest.
The really odd thing here is they stuck the power cord through the bottom grill (ruining the grill) rather than putting it through the SLOT that was cut for the power cord. Not sure about the logic for that one :-)
|
Step 1, Remove Everything
Date 10/28/2004
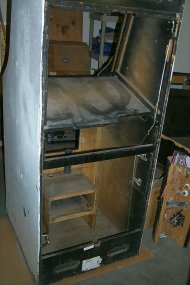 Everything has been removed from the game, inside and out. Everything has been removed from the game, inside and out.
Looks better already! Make sure you bag all the parts so you don't lose them!
|
Transformer Board
Date 10/28/2004
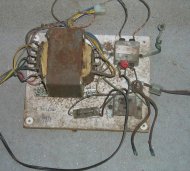 It looks ugly and the borad it's mounted to is a bit beat up. It looks ugly and the borad it's mounted to is a bit beat up.
We'll be making a new replacement board for it. Everything else should clean up.
|
Coin door and Harness
Date 10/28/2004
 The harness is attached to the coin door, so we removed them both as one item. The harness is attached to the coin door, so we removed them both as one item.
This should make life a little easier. We'll remove the harness later and put it back in the cab after it's been painted.
|
Cleaning has begun...
Date 10/28/2004
 Everything was taken out and the Wet & Dry Vac was used to clean out the remainder of the junk. Everything was taken out and the Wet & Dry Vac was used to clean out the remainder of the junk.
I don't worry about picking through the mess as the Wet & Dry Vac will suck everything up and you can sort through it in the vac. I empty the VAC before restoring each game so I don't have as much to sift through.
|
Removing Paint from Right Side
Date 10/28/2004
 Well I stripped the right side of the game using the technique described on my Photo Tutorial page. Well I stripped the right side of the game using the technique described on my Photo Tutorial page.
The results are outstanding! In this picture, most of the paint has been stripped so far.
Looks a little messy right now. However, take a look at the pictures following this one.
|
Getting there!
Date 10/28/2004
 It still doesn't look that great, but it will. It still doesn't look that great, but it will.
|
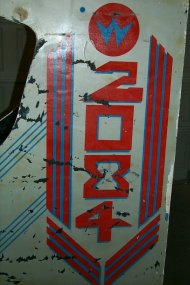
How good is it?
Date 10/28/2004
 How good is it? How good is it?
Take a look at the close up. Notice how clean it looks. This works so much better than any previous techniques I've tried.
|
Stripped!
Date 10/28/2004
 Here are the final results. I'm still going to repaint the sides, but if you didn't have the stencils or paint to redo the sides, this would be acceptable in a lot of game rooms! It's very difficult to tell that this was painted all white before. Here are the final results. I'm still going to repaint the sides, but if you didn't have the stencils or paint to redo the sides, this would be acceptable in a lot of game rooms! It's very difficult to tell that this was painted all white before. This is now my official technique for trying to recover the Art underneath the paint.
|