Work to Do
Date 9/15/2004
Here is a list of things that need to be done (may not be complete, and not in any particular order). Remove all parts from the cabinet Strip Cabinet down to just the wood Sand Down Cabinet Fill in scratches/holes Mask off Cabinet Paint Apply Side Art Strip and Replace CPO on Control Panel Clean and Lubricate Joystick Clean Buttons Strip and Repaint Coin Doors Test Ballast and Light Fixture Clean and Cap the Monitor
|
Parts Needed
Date 9/15/2004
Ok, now that I have gone through the game here is a list of parts that I need. Working Sound Board Working Power Supply Board Working Kocker Metal Brace that holds the Marquee in Volume POT Locks
|
Checking the game out...
Date 9/15/2004
The first thing we need to do is check out the game and see what we have and what we don't have. Below you will find a complete walk though of the game as well as what's good and bad about it. So on to the inspection.
|
Let the Inspection begin!
Date 9/15/2004
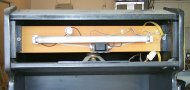 We start with the Light Fixture and Marquee. As you can see from the picture the Marquee is missing. That is the way I got the cabinet. I have a Marquee though, so this isn't going to be a problem. I am missing the metal plate that holds it in place though. We start with the Light Fixture and Marquee. As you can see from the picture the Marquee is missing. That is the way I got the cabinet. I have a Marquee though, so this isn't going to be a problem. I am missing the metal plate that holds it in place though. Looking at the lighting fixture, you can see that is in excellent shape! I'll test the balast, as described here, before I attempt to power it up.
|
Front Glass
Date 9/15/2004
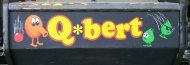
 As you can see, the front glass needs to be cleaned! It's a little hard to see in the picture, but if you look at Q*Bert in the lower right corner, you'll see that the art is really starting to flake. I'll keep this one for now, but I may get a Repro glass (Plexi) from Arcade Renovations. As you can see, the front glass needs to be cleaned! It's a little hard to see in the picture, but if you look at Q*Bert in the lower right corner, you'll see that the art is really starting to flake. I'll keep this one for now, but I may get a Repro glass (Plexi) from Arcade Renovations. I'll post pictures another time of it cleaned up. A word of Caution as well, if you have a bezel that is flaking like this, DO NOT get the art wet as it will disingrate once it dries!
|
Control Panel
Date 9/15/2004
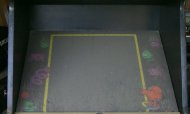
 Looking at the picture we can see that control panel isn't in horrible shape, but it will look a lot better with a brand new control panel on it. I hapen to have a replacement one that I will put on it. The buttons and the joystick are orginals too! Looking at the picture we can see that control panel isn't in horrible shape, but it will look a lot better with a brand new control panel on it. I hapen to have a replacement one that I will put on it. The buttons and the joystick are orginals too! That's a good thing since the Joystick is not a standard joystick. It has a different handle then most and it's mounted at an angle. You could replace it with another joystick, but I don't think it would feel right for this game.
|
Front Art
Date 9/15/2004
 The front art actually looks like it's in really good shape. The front art actually looks like it's in really good shape.
I have a replacement for it, but I'm not sure I want to replace it at this time. I'll see what it looks like after I clean it up.
|
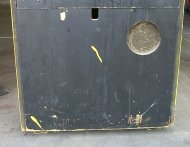
Coin Doors
Date 9/15/2004
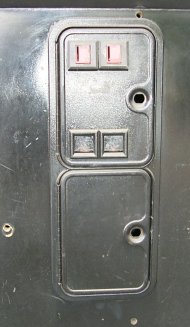 The coin doors are in excellent shape. You can see a tiny bit of rust on the coin eject covers. It's also scratched up in a few places, so I'm going to strip the doors and repaint them. We are also missing both locks and those will have to be replaced. Those I'll probably get from Bob Roberts. The coin doors are in excellent shape. You can see a tiny bit of rust on the coin eject covers. It's also scratched up in a few places, so I'm going to strip the doors and repaint them. We are also missing both locks and those will have to be replaced. Those I'll probably get from Bob Roberts. You'll also notice that this game had a security bar over the coin door at one time. Those holes will be filled, which means we will need to repaint the front of the cab as well. I'm painting the rest of the cab, so one more part won't hurt I suppose.
|
Right Side
Date 9/15/2004
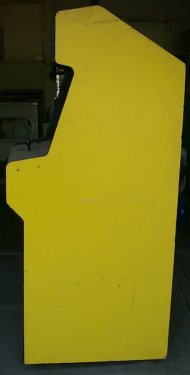 The sides are in pretty decent shape, but they do have scratches in them and the paint job isn't that great. The sides are in pretty decent shape, but they do have scratches in them and the paint job isn't that great.
I'll be repainting both sides, the front and the back.
|
Left Side
Date 9/15/2004
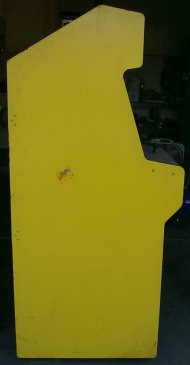 As you can see this side is about the same. As you can see this side is about the same.
There is a sticker on this side though and that will come off when the sides are repainted. Not sure if I want to completely strip the sides down or just sand them down and add new paint. Could be a good time to experiment, depends on how bad the scratches are on the other side.
|
Top of Cabinet
Date 9/15/2004
 This is in excellent condition and I might not need to paint it. This is in excellent condition and I might not need to paint it.
I may anyway just to make sure the paint matches the rest of the back. Just a little bit of dust on there....
|
Back Doors
Date 9/15/2004
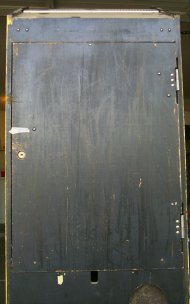 I'm not sure why, but a good portion of my games need to have the back door(s) replaced. Maybe it's beacuse people try to break into the games from the back and wind up destroying them. I'm not sure why, but a good portion of my games need to have the back door(s) replaced. Maybe it's beacuse people try to break into the games from the back and wind up destroying them. Luckily in this case though, the doors are in excellent shape and the only thing that needs to be done is to repaint them.
|
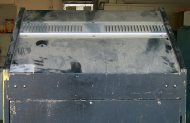
Back, Lower Vent
Date 9/15/2004
 Here we can see the lower part in the back of the machine with the vent. Here we can see the lower part in the back of the machine with the vent.
Caked with dirt, but other than that, it's fully in tact. Not much to do here except paint.
|
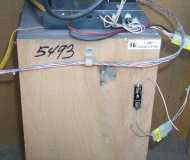
Peek Inside, the door first...
Date 9/15/2004
 I got lucky with this cab as it has all the original wiring harness, stand offs and clips (holding the wires in place). If this didn't have all of that and I would have had to build my own wirring harness I would have gone with a switching power supply. I got lucky with this cab as it has all the original wiring harness, stand offs and clips (holding the wires in place). If this didn't have all of that and I would have had to build my own wirring harness I would have gone with a switching power supply.
As it is now, I will attempt to locate an original power supply board and work with that.
|
Crispy!
Date 9/15/2004
 As with a lot of games, you'll find Molex connectors that get a bit crispy. As with a lot of games, you'll find Molex connectors that get a bit crispy.
Q*bert is no different. Electronics has come a long way :-)
|
Treasure!
Date 9/15/2004
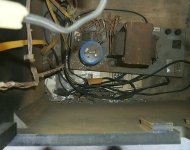 Well, maybe not. Well, maybe not.
Lots of screws, washers, bolts, and dust/dirt. The Transformer is still there, not bolted down and getting rusty.
|
Knock, Knock, Who's there?
Date 9/15/2004
 Well I wish I could say the Knocker is, but it is not. The knocker is used when Q*bert falls off the pyramid. You hear him scream "YAAAAAAAAAAA" then the Knocker fires hitting the wood making that distinctive "Thwack!" when he hits the bottom. Well I wish I could say the Knocker is, but it is not. The knocker is used when Q*bert falls off the pyramid. You hear him scream "YAAAAAAAAAAA" then the Knocker fires hitting the wood making that distinctive "Thwack!" when he hits the bottom. If you own a Q*bert you need this part working to enjoy the game in it's entirity.
|
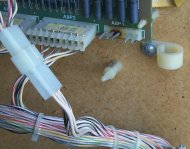
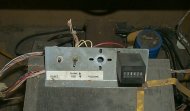
Service Switches, From the back
Date 9/15/2004
 The service switches have been modified. The service switches have been modified.
You'll also notice that the Volume pot is missing. I'll have to find one of those. I'll have to research this and figure out what the value for this is.
|
Service Switch, From the Front
Date 9/15/2004
 Here you can see what the service switches look like from the front. Here you can see what the service switches look like from the front.
The sticker is still there, so that's good.
|
Wirring on the Inside Right
Date 9/15/2004
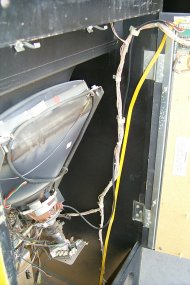 Here is how the wirring is routed on the right inside. Here is how the wirring is routed on the right inside.
|
Wirring on the Left Side
Date 9/15/2004
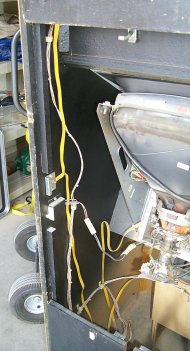 Here is how the wirring is routed on the left inside. Here is how the wirring is routed on the left inside.
|
The Oddity...
Date 9/15/2004
 I'm not sure why Gottlieb designed the cab this way, but they did. I'm not sure why Gottlieb designed the cab this way, but they did.
It's rather odd if you ask me. The speaker is screwed to a board that you can slide in and out of the cabinet. It has two latches that hold it in place. Maybe it's to make working on the speaker easier. Who knows.
|