Date 3/29/2000
I created this page and went through the machine to figure out what I need to do. The answer: A lot. The majority of the work is going to be stripping the cabinet and repainting it.
|
Date 3/29/2000
 So now all we have left is the glue on this side, and then we have to clean the other side. So now all we have left is the glue on this side, and then we have to clean the other side.
I started out using a Wood Chisle to try and scrape the glue off and found that it wasn't working too well. It was doing more damage to the paint then it was scraping glue off.
|
Date 3/29/2000
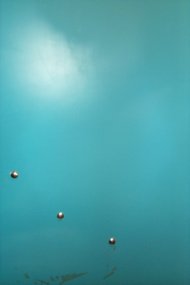
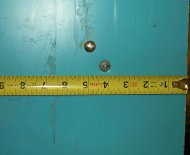 The final measurement I made was from the back of the cabinet to the edge of the glue. The final measurement I made was from the back of the cabinet to the edge of the glue.
As you can see in the picture, its just below 6 5/8". Moving it to 6 1/2" may not be too bad, I'll have to look at it once I have the side art laying on the game.
|
Date 3/29/2000
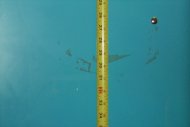
 Now if we take a look at the other side, we can see that it is close to the same, but not quite. Now if we take a look at the other side, we can see that it is close to the same, but not quite.
The right side is off by 1/4". At this point, I would go with the 30 1/2" since its a nice even number. If anyone has a different measurement on an original Donkey Kong with original Art, I would love to hear them. I am going off of the Glue that was left. so the measurements are not going to be 100% accurate. I also find it hard to believe that they could get an exact placement on every cabinet from the factory.
|
Date 3/29/2000
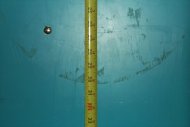
 Now before we move on to the glue, we want to use this to our advantage and take some measurements of where the side art should go. We start by measuring the side we are cleaning. There isn't much glue left on this side, but we want to measure it to compare against the other side. Now before we move on to the glue, we want to use this to our advantage and take some measurements of where the side art should go. We start by measuring the side we are cleaning. There isn't much glue left on this side, but we want to measure it to compare against the other side. We measure from the top of the cabinet to our glue, which would be the bottom of the side art. In this picture you can see that it is around 30 1/2 Inches.
|
Date 3/29/2000
 After scrubbing away at the paint, we now have a much cleaner cabinet :-) Minus a little bit of paint, but even that still looks better than the graffiti! After scrubbing away at the paint, we now have a much cleaner cabinet :-) Minus a little bit of paint, but even that still looks better than the graffiti!
|
Date 3/29/2000
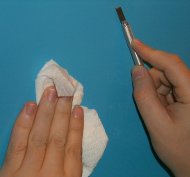
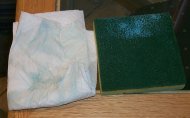 This is where the Cleaning pad comes in! The problem with the cleaning pad is it will remove some of the paint as well. However, for this restoration, that won't be a problem because we are going to repaint the cabinet anyway. If you want to keep the paint job as clean as possible, you'll have to go back to the 409, paper towels and lots of elbo grease. This is where the Cleaning pad comes in! The problem with the cleaning pad is it will remove some of the paint as well. However, for this restoration, that won't be a problem because we are going to repaint the cabinet anyway. If you want to keep the paint job as clean as possible, you'll have to go back to the 409, paper towels and lots of elbo grease. Why clean off the graffiti if we're going to repaint it anyway? Well, we don't want anything to show through the paint (I plan on just putting a couple new coats of paint over what is there) and we want the surface as sooth as possible. Leaving the glue and graffiti would be counterproductive.
|
Date 3/29/2000
 Here you can see the graffiti that was written in what appears to be permanent ink (Sharpie?). This is going to require something more than paper towels to get off. Here you can see the graffiti that was written in what appears to be permanent ink (Sharpie?). This is going to require something more than paper towels to get off.
|
Date 3/29/2000
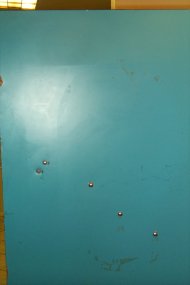 This is the AFTER picture. This is the AFTER picture.
As you can see, we still have some graffiti left and most of the glue from the side art that was peeled off prior to me getting it. The fact that the Glue is still there will help us (keep reading!).
|
Date 3/29/2000
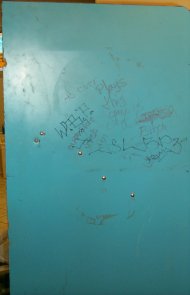 As seen in other pictures this cabinet was vandalized. As seen in other pictures this cabinet was vandalized.
How do we fix this? The first way is to break out the 409 Cleaner and go at it. In this case, it does the job for about 90% of the Graffiti. This is the BEFORE picture.
|
Date 3/29/2000
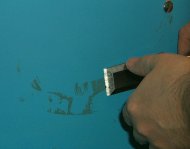
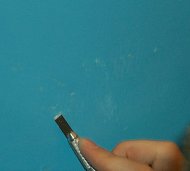 So I switched to an Exacto knife. So I switched to an Exacto knife.
This worked great! You have to be careful and choose a nice fat and flat blade. You should also avoid putting too much pressure on the knife or you'll gouge the side.
|
Date 3/29/2000
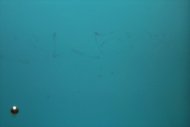
 As you can see, it has done a great job of getting the glue off. As you can see, it has done a great job of getting the glue off.
What ever is left, you can get off with 409 and paper towels.
|
Date 3/29/2000
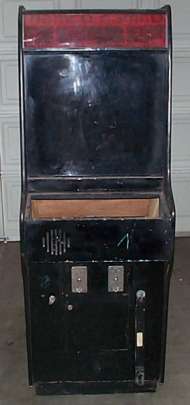 Here is front of the cabinet. Here is front of the cabinet.
Its been painted all black like all the rest of the Conversions on the planet. There is no control panel which is fine since I have an extra. The security bar must go, and the holes filled. The coin door is in pretty descent shape.
|
Date 3/29/2000
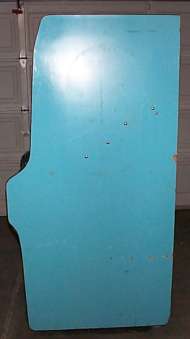 Here is the right side, if you look closely you can see where the Side Art USED to be. Here is the right side, if you look closely you can see where the Side Art USED to be.
|
Date 3/29/2000
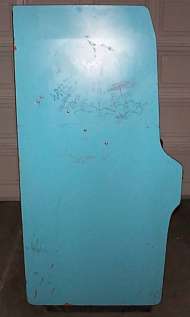 Here is the left side. Here is the left side.
Apparently it was in a good part of town by the autographs of the local celebrities in the area.
|
Date 3/29/2000
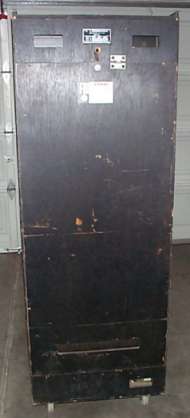 Here is the back of the cabinet. Here is the back of the cabinet.
It needs to be repainted. Other than that its in pretty good shape. The door has a little bit of splintering at the bottom, but I should be able to patch that up.
|
Date 3/29/2000
 The monitor is here, and more importantly is that its rotated the right way! The monitor is here, and more importantly is that its rotated the right way!
I also slapped a JAMMA board in the cabinet and powered it up. Everything works just fine.
|
Date 3/29/2000
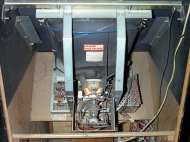
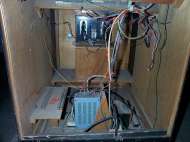 The original Power Supply is gone (Isolation Transformer is still there though). Which isn't a problem since I want a Switcher in there anyway. The original Power Supply is gone (Isolation Transformer is still there though). Which isn't a problem since I want a Switcher in there anyway.
You'll notice that the PCB holder is just a board and there is no Cage like the Popeye Cabinet. The original wiring harness is history so I am going to have to build a new one from scratch (unless someone has a Donkey Kong harness lying around)
|