The starting point...
Date 8/17/2017
Overall the cabinet is pretty solid. Most of the problems with it are the rust and paint issues. This is NOT going to be a full ground up restoration. I am going to try and preserve and repair what I can and only replace what can't be preserved or repaired. This means the game isn't going to be shiny new, but it will be as original as possible.
|
Start with the easy one...
Date 8/17/2017
On a lot of restorations you ask yourself "Where do I start?". Well for this one, we'll start with the easy stuff as it motivates you to take on the more challenging aspects of the restoration later. Here you can see that when they installed the "Operator Key" (a screw to hold the back door on) they missed the center of the blocking causing the blocking to split a little bit. The blocking acts as a stop for the back door. They also decided to turn the interlock switch 90 degrees since the back door probably didn't fit snugly since they didn't screw it in correctly... | 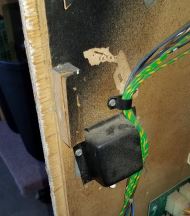 | | | | This is any easy fix. Use some Gorilla glue and a few clamps and it will be good as new. | 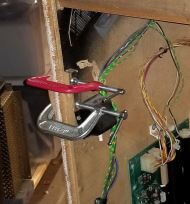 |
|
Getting a handle on it....
Date 8/17/2017
| Next up, is the cleaning of the handles. Easy enough. Remove 6 screws, and pull them out. | 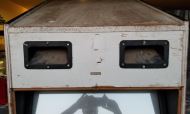 | | | | | Hit them with some Fantastik cleaner and scrub them with a sponge... much better now. | 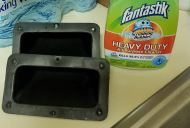 |
|
The Top
Date 8/17/2017
Unfortunately, the top is going to have to be sanded down as there is some water damage. I'll have to primer it and repaint it. Might try rolling it on for this since it's a small area and prepping for spraying is very time consuming. | 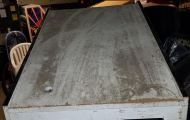 |
|
Monitor works!
Date 8/18/2017
Pulled the monitor out of the game and put it on the bench to test it since I don't know if the PCB's are any good or not. Will find out tomorrow when my Switching Power Supply comes in. Works great. Still has the original caps and flyback, so going to leave it alone since it's currently working. | 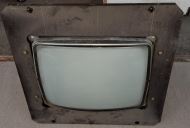 | Broke out the cleaners and cleaned the frame with Pledge and then cleaned the front of the monitor with Invisible Glass. | 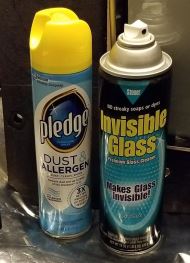 | The tube on this is fantastic! ZERO burn in on this tube. Everything cleaned up nicely on this too. No point in painting the wood as it will be covered up by a cardboard bezel on the outside. | 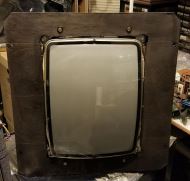 | One of the wedges holding the Yoke in place fell out, so I hot glued it back in place. There are TON of convergence strips on this monitor as well. Not sure why unless someone just got annoyed with trying to converge it with the rings. I know it's the original tube because the serial number sticker on the tube matches the one on the chassis and the frame. | 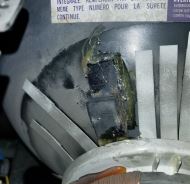 | | | |
|
Interlock Switch fixed
Date 8/18/2017
| This is a very common "fix" for games. The problem it solves is for back doors that do not close properly and the switch never gets pressed in all the way. So the game never comes on, or randomly cuts off during game play if they rock the machine. | 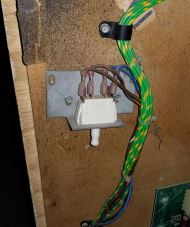 | | The real fix is to adjust the switch or fix the back door so it doesn't move. | 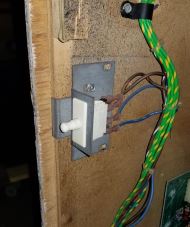 | | Put the cover back on and we're good as new. | 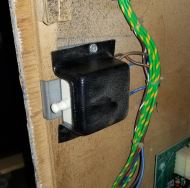 |
|
Marquee Bracket
Date 8/18/2017
| Pulled the Marquee off and the bracket looks like it has 30+ year old gum on it. Time to get that off! | 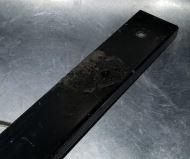 | | Break out the cleaners... | 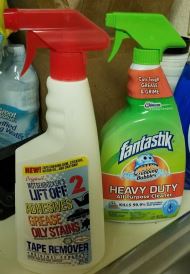 | | This requires a little extra help too, so I broke out the razor blade... | 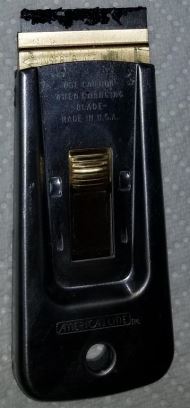 | After several passes with a brush and a little help from the razor blade, we're all clean!
It has some scratches on it, but nothing major to the point where I would re-powder coat it. I could probably just touch it up with rattle can, but I'm opting to leave it as is for now. | Before:
After:
| | | |
|
Speakers are good to go!
Date 8/18/2017
| Not much to say here. Speakers are in really nice shape and just need a little cleaning on the back. | 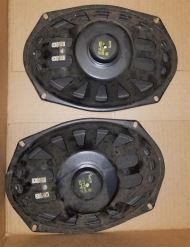 | | | 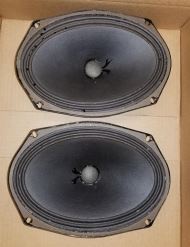 |
|
Cleaned the Speaker and Marquee Light Area
Date 8/18/2017
As you can see, the speaker area is a little dirty. Not horrible, but enough that I pulled the speakers out and cleaned the area with Pledge. I wanted to do this anyway to avoid any over spray of clear coat when I do the sides of the cabinet. | | It turned out decent, but not perfect as it appears to have some defects in the surface that makes it rough. It's better and it's going to be hidden behind the marquee, so I'm not concerned that it's not perfect. | 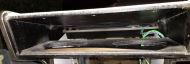 | | | |
|
Pulled and tested Marquee Light....
Date 8/21/2017
Pulled the Marquee Light fixture out of the game and cleaned and tested it. Pulled the tube out of the bracket and cleaned it up. Don't know if the tube and starter work yet, will find out when I re-install it in the cabinet. | 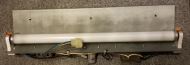 | To test the ballast you need to measure the resistance (Ohms) between the two wires in the ballast. To do this, I undid the wire nut one side and cut the wire on the other side. I figured if it was bad, I would have to replace it anyway, and if not, I'll just use a wire nut to re-attach it. Resistance was around 27 Ohms, which should be good. You should expect around 26 Ohms for a good one. (see this page for more details on testing your light fixture) I also replaced the zip ties holding the wires as they were brittle and broke off. | 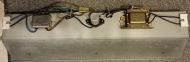 |
|
Bezel saved (sort of)
Date 8/21/2017
| The bezel on this is in pretty bad shape. A lot of the art is lifting from the glass at the bottom. Part of that is the instructions for the game. | 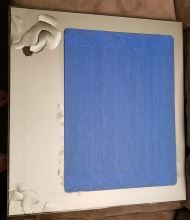 | I purchase a couple of cans of Krylon Triple Thick 0500 clear coat. I then masked off the center of the bezel and sprayed the paint. The hope is that it will preserve it and keep it from separating. This partially worked. While it works, it is very important that you keep a few things in mind.
1) You MUST get the Triple Thick under the lifted pieces.
2) Small pieces are going to be an issue.
3) If you get ANYTHING sticky near the pieces before you spray it and try to remove it, it's going to get worse. I was masking off the main glass and accidentally got too close to the art and it made part of it worse.
4) You have peel the saran wrap off very carefully and slowly. Small pieces will tend to come up with it and there is no getting them back.
I think if you get it soon enough you can make it work. Might be a good preventative measure as well for ones that haven't started yet, but will. | 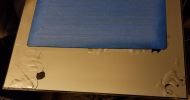 |
|
Side Art Clear Coat has begun.
Date 8/21/2017
I hit the sides with their first coat of clear coat in the hopes that I can preserve what is there. I used close to a can of Krylon Triple Thick on it. Will let that dry, hit it again with another can and hope for the best. So far from the few spot checks I've done it has helped. Just need to put it on thick enough that an accidental rub on the sides won't take a lot of the art off.
|
Cleaning the front
Date 8/22/2017
| The front isn't in that bad of shape, needs to be cleaned up a bit, then I'll probably hit it with some clear coat. |  | | Spent some time with a Magic Eraser and lightly (emphasis on the lightly) cleaned the front. Now that it's clean, I'll remove the coin door and lower bolts and then clear coat it to protect it going forward. |  |
|
Power Brick really needs help....
Date 8/22/2017
The Power Brick has seen a lot better days. I'm going to have to pull it and figure out what needs to stay and what can go.
I will be replacing the power cord, line filter, and fuse block for sure.
Don't know if I need the caps or other parts yet. Will have to study the wiring diagram and the schematics to see what does what. I'll also have to verify that the wiring is correct. With this game you never know.
I'll probably pull the Transformer off, clean it up and spray it black. |  |
|
Pardon my French....
Date 8/22/2017
But the PCB that was installed in the cabinet is F@CK3D! It looks like the PCB was stored under water.... It's going to be a major project to bring that back to life. Luckily the game came with a spare PCB which doesn't look as bad. I still need to check it out more, but I think it will work.
|
Verified the wiring.
Date 8/31/2017
I wanted to verify my Power Brick was wired correctly so I asked on FB for pictures of others. Turns out there is probably a few different variations. The picture shows someone elses wiring compared to mine. They had a second machine that they posted pictures of and it was the same as mine, so I'm happy that mine is wired correctly. | 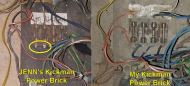 |
|
Cabinet has been stripped and cleaning has begun.
Date 8/31/2017
|
Working on the Top...
Date 8/31/2017
Started Sanding the top of the cabinet today as well. The top is dirty and has some water damage to it. The top is made from MDF, so any exposure to water tends to damage it. | | I cleaned it off, and started sanding it... I'm using 100 Grit sand paper with an orbital sander. It's getting better, but still rough to the touch. | 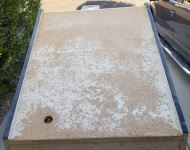 | Probably going to need to use wood hardener and something like MH Patch to smooth it out. | 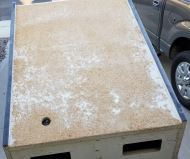 |
|